Usually, if I need to create concentric circles or rings for illustrations or infographics, I use a hacked up pie chart to create slices within a circle. That’s until I found the polar grid tool in Illustrator. What a time saver!
With the polar grid tool, you can control how many rings and slices to create. Using just a few steps, you can also expand and slice the rings to create segments. This allows you to customize your rings for things like visual taxonomies and other infographic pieces.
I made this video to help me remember how to create these types of illustrations. Hope you find it helpful too! The video has no narration; just how I created this visual step-by-step. Written instructions are below.
Step-by-Step Instructions
Create a Polar Grid
Click and hold the line segment tool in the toolbar. Select the Polar Grid Tool.
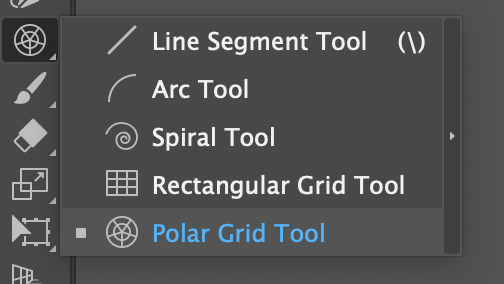
Click on your artboard
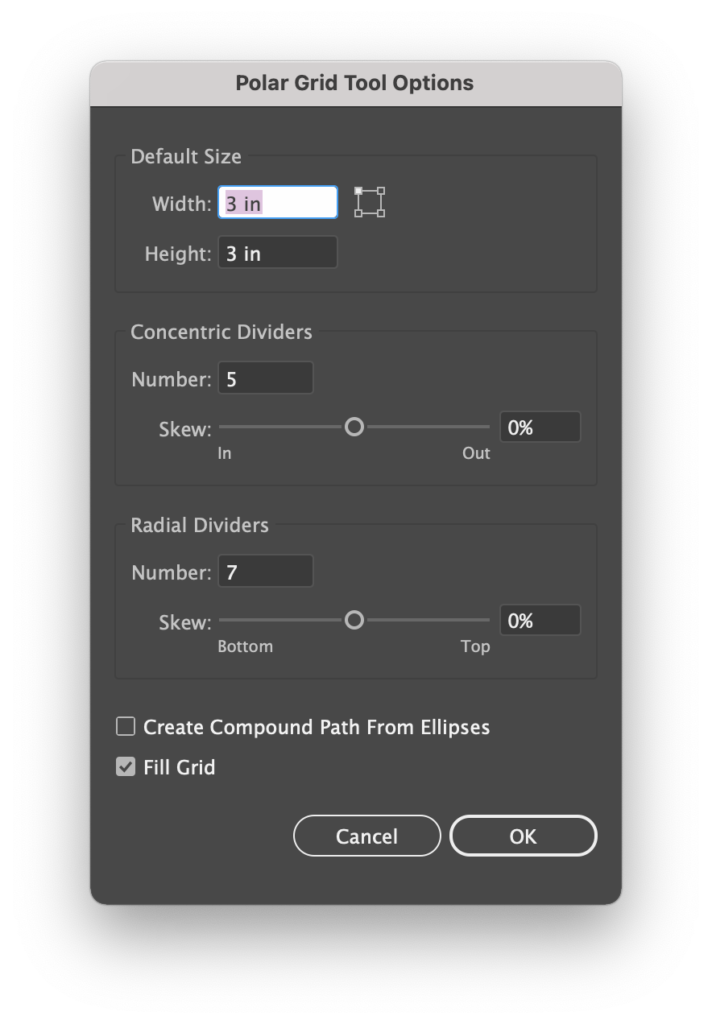
In the window, select the number of rings and segments you’d like. Check Fill Grid to fill the shapes with your fill/stroke colors.
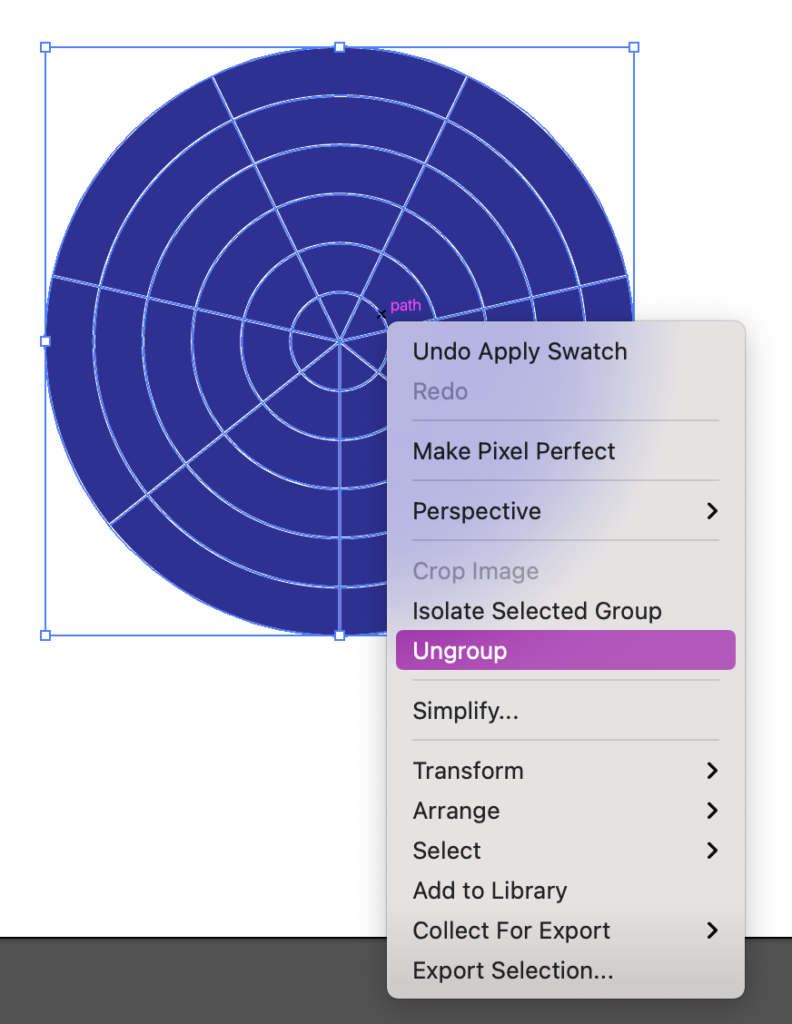
Now you have a polar grid ready to customize.

Create the Rings
At this point, the ‘rings’ of your concentric circles are just paths. Let’s combine them into shapes with a fill and slice.
First, ungroup your polar grid to separate the two group. Group 1 contains the line segments; group 2 contains the ellipse paths.
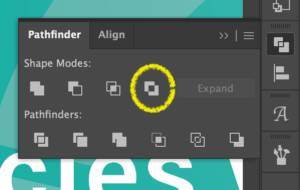
Click on your artboard to deselect the groups. Then click on the circles to select the ellipse path group. In the Pathfinder menu, click Exclude to create filled rings.
Now you have three concentric, filled circle paths. Delete the center one so only two remain.

Prep the Line Segments
Next, we will set up the line segments to slice the circles into parts.
Click on the line segment group.

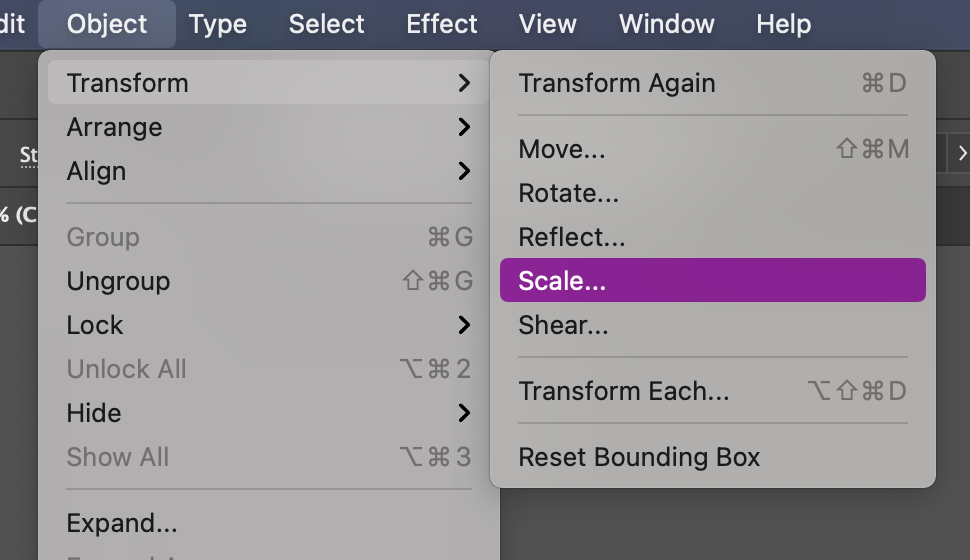
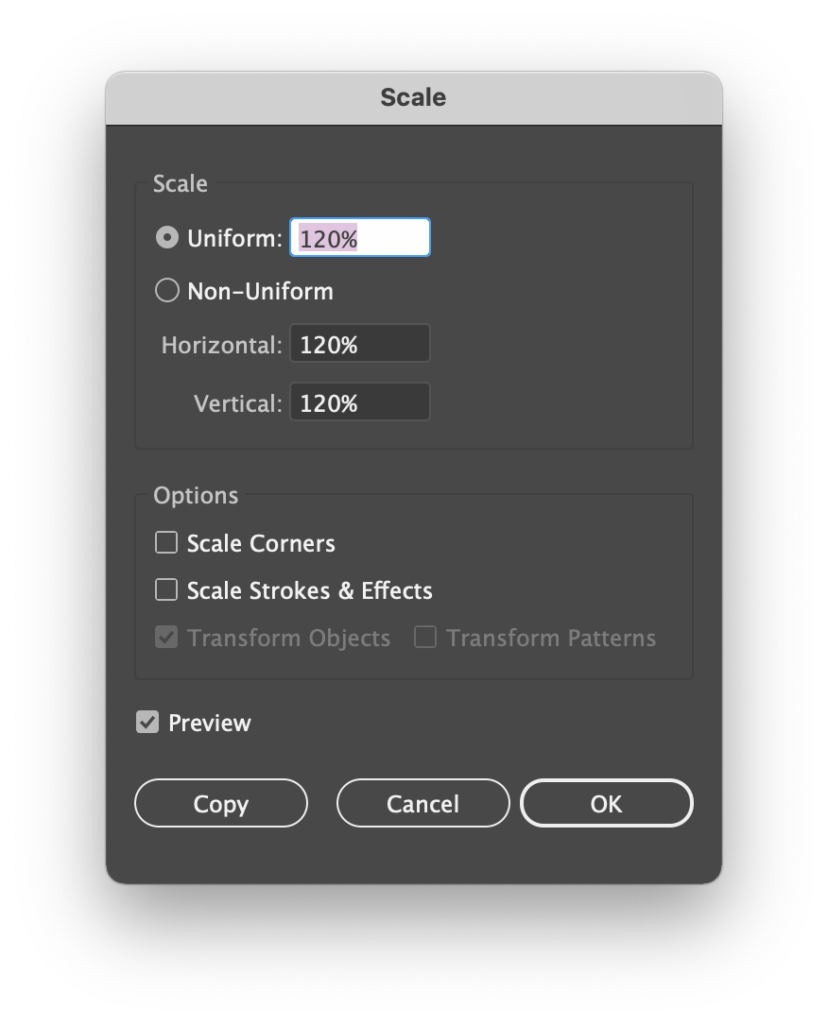
We need to make sure the line segments cross the outer ring, so we’re going to scale it to extend beyond the edge of those rings. With the line segement group select, click Object in the menu, then Transform, and then Scale.
You don’t have to go crazy here. I find ~120% is plenty.
Your lines should now extend past the outer ring.

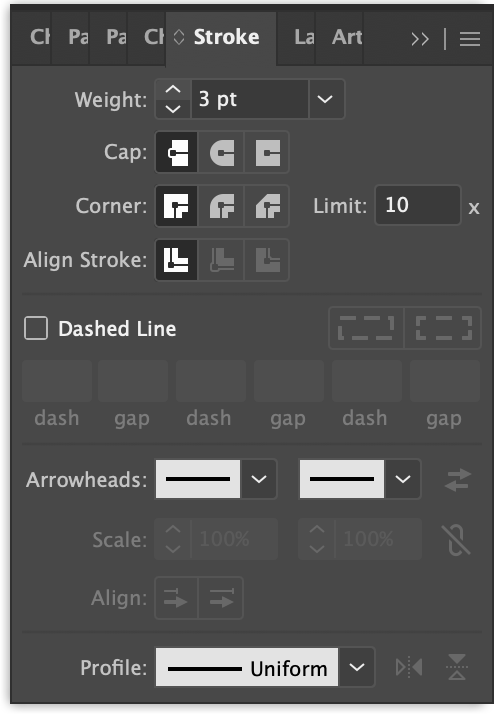
Next, we’ll adjust the line segment stroke width to determine how much space will appear between ring slices. In the Stroke menu, increase or decrease the stroke.
Once you have the stroke where you want it, we need to outline the stroke.
With the line segment group still selected, click the Object menu, Path, and then Outline Stroke.
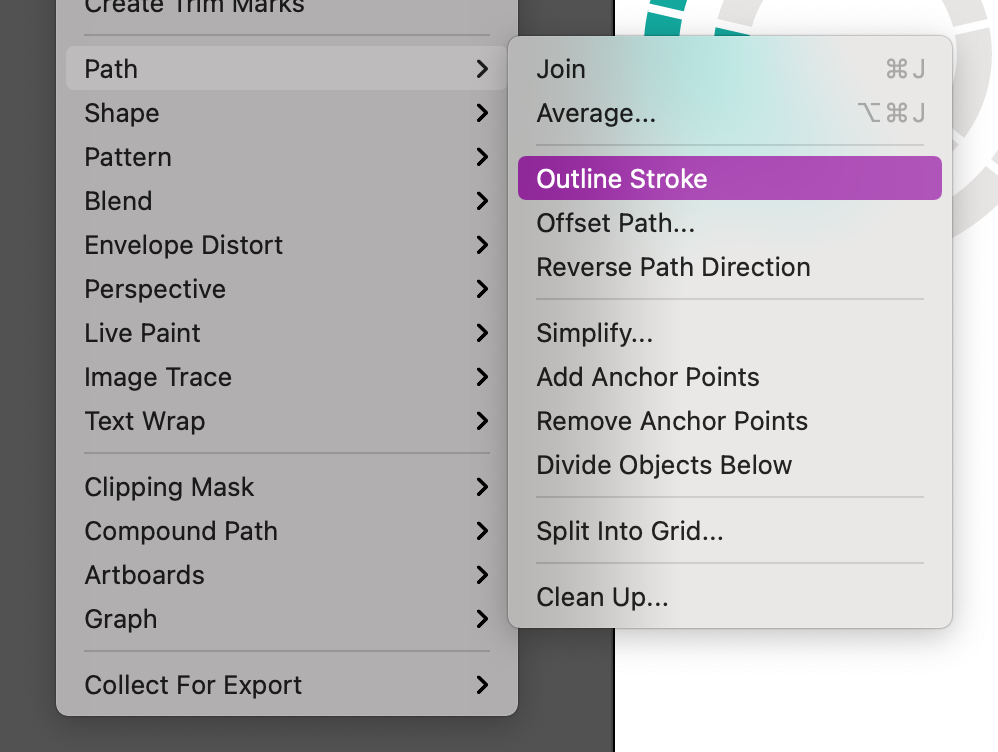
Your line segment will now transform into filled shapes, but still grouped.
Slice the Rings
Lastly, we’ll just the filled, line segments we just created to slice the rings.
Click and drag to select both groups: the line segments and the rings. In the Pathfinder menu, click on Divide.
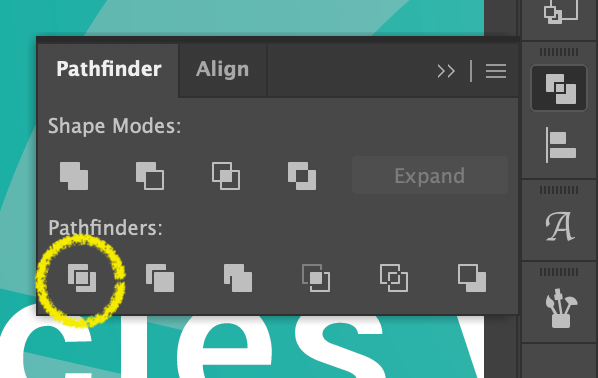
Now, deselect and click on one of the ring segments. You’ll see they are now all their own separate shape! We did it! To clean up, slick on one of the ring segments and use the Select menu to select all the same shapes.
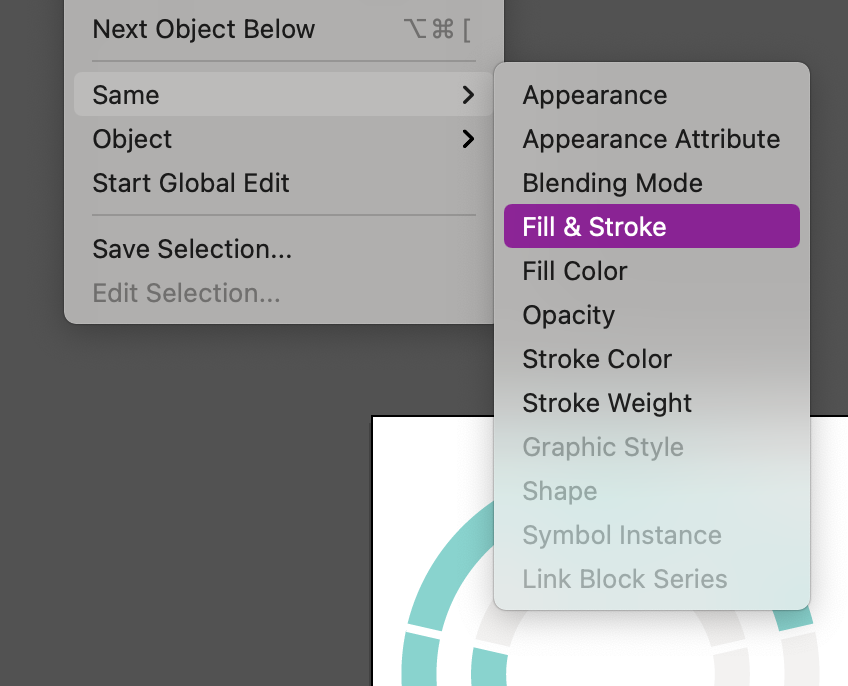
Then cut the selection, select and delete the line segments, and then paste. Your circles are now ready for you to use!